AZ Edit Programming Part 1
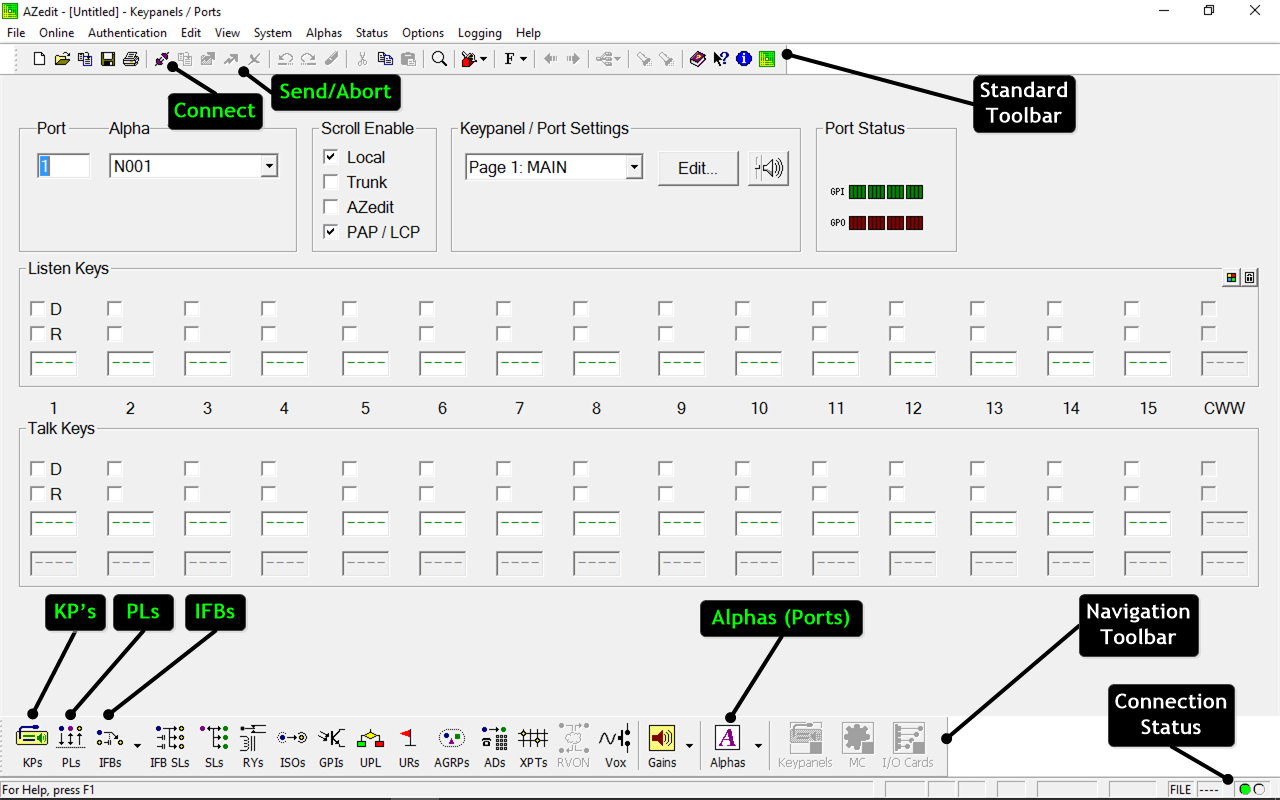
The Main AZedit Edit start screen opens up to the KP's (Keypanels) screen when launched.
The default installation has 2 toolbars, one "Standard" toolbars at the top and 1 "Navigation" toolbar at the bottom. Two more toolbars can be turned on or off by right-clicking in the toolbar area, or from the View menu, or from the red icon in the middle of the top toolbar.
There's also a status bar at the very bottom.
Two blinking green dots in the lower right corner mean that the PC has a viable connection with an intercom. The plug and socket icon will establish a connection and upload the current file from the intercom to the PC. From here you can edit the current config or load one from the hard drive. Main Menu - Online Load File.
You can build, edit and save configuration files either on or offline with an intercom.
Any changes made to the configuration will be highlighted in yellow as a reminder that they are either not yet sent or saved. The usual windows file menu, New, Open, and Save work as normal.
Most functions can also be accessed via the normal menu dropdowns.
Understanding how to name Alphas, build PL's IFB's and laying out key panels are the most important concepts.
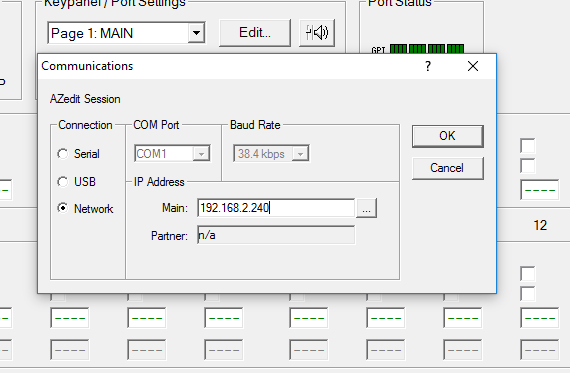
To Connect to a frame - on the main menu navigate to OPTIONS, COMMUNICATIONS - Choose Serial, USB or Network.
The square with dots to the right of the IP field may show available intercoms depending on the overall networking setup (may not work on a virtual machine).
After making a selection, and entering a valid IP - you should see CONNECT and 2 green blinking dots on the status bar - lower right corner. If so click Connect on the main toolbar. If you don't have green flashing dots check physical wiring and test IP connectivity using the CMD prompt and Ping.
You can run multiple versions of AZ edit at the same time. Go to AUTHENTICATION, CHANGE INTERCOM to add, delete and connect to other sessions. You can add a desktop shortcut for each session using the second Navigation toolbar. There's also an option to set the default frame.
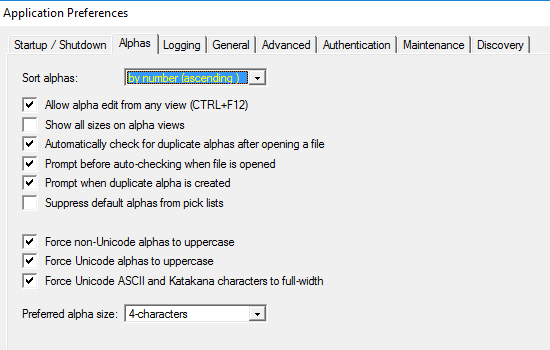
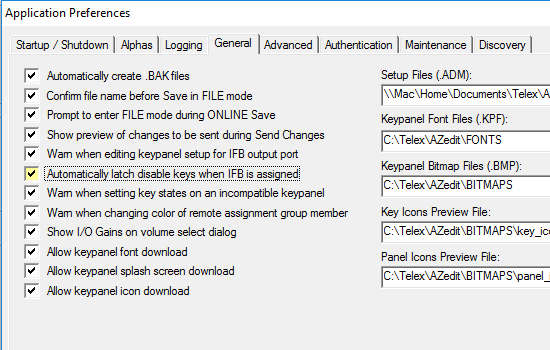
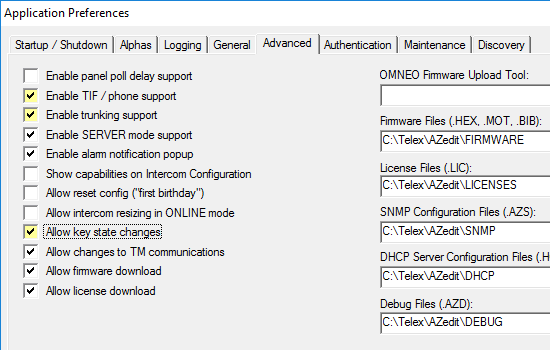
Preferences (under Options on the main menu) are specific to your PC and how it interacts with the intercom, different users can have different preferences.
These are recommended changes from the RTS default installation.
ALPHAS TAB Sort Alphas: by number (not Alphabetical).
GENERAL TAB Turn on Auto Latch Disable IFB.
ADVANCED Turn on Enable Tif Support, turn onTrunking support (if it's a trunked system) and turn on Allow Key State Changes.
Click or Apply or OK to save Changes.
Also on the Nav 2 Toolbar, IO Gains, select "Real-Time Changes" in the Options area.
Ports and Alphas - to create some basic point to point communication between key panels takes a few short steps.
It's best to start on the ALPHAS screen. This is where the PORTS are labeled. Ports are similar to the inputs and outputs of a router or mixer and are how the intercom knows where audio is entering and leaving the frame, either via physical wiring to the backplane - Key Panels, Cameras, 2-4 wire converters, Tifs or via internal Audio Cards - RVON MADI or OMNEO.
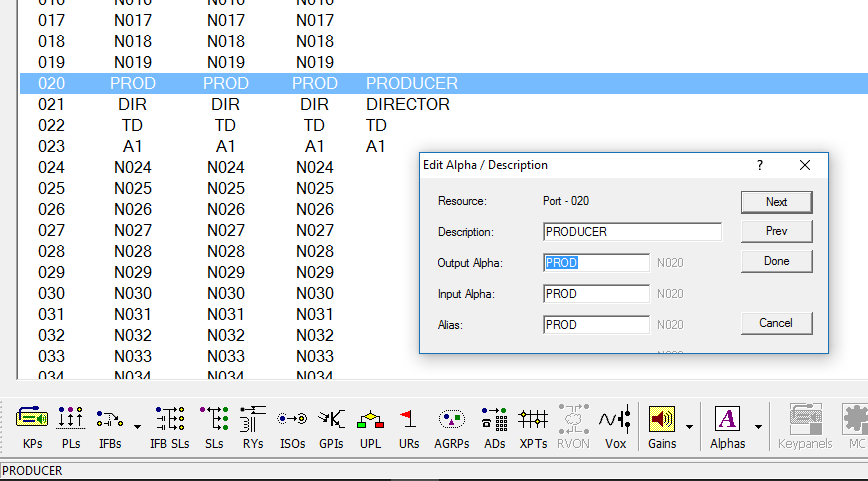
Here ports 20 - 23 are re-named to PROD, DIR, TD and A1.
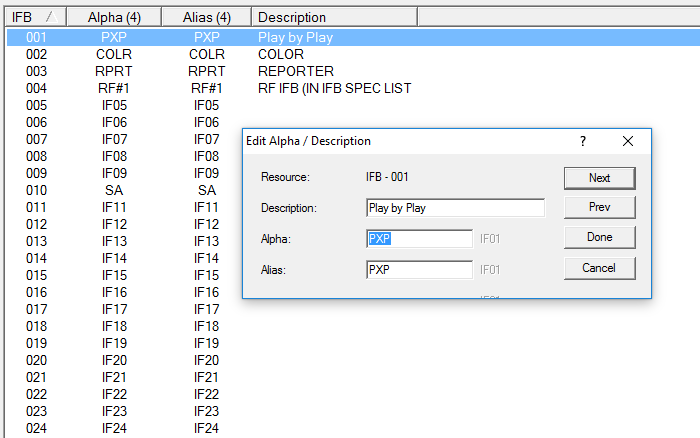
Double-clicking on any existing Alpha opens up the dialog box to edit the Description, Alpha, and Alias of a particular port.
Most systems typically allow only 4 Characters for the ALPHAS, these are the abbreviated names users will see on their Key Panels. The description only appears in AZ edit. The ALIAS is how the port shows up on other Intercoms via Trunking.
PREV and NEXT allow quick scrolling through the ports to quickly name alphas.
Newer versions of firmware allow the INPUT and OUTPUT side of the port to be named individually if required. (However, it's not possible to use the search key assignment function to find Input alphas).
Now some ports have Alpha's - return back to the KPs screen. The two top left box's display the current port and allow navigation to the other ports via number or Alpha.
Type either 20 in the Port box or select PROD in the Alpha dropdown. You can now start editing the key panel. In the talk keys, enter the other ports or alphas - DIR TD A1.
There's also a listen side to each key, for point to points between key panels - it's not necessary to have anything programmed on these, the intercom will automatically turn on the listen on key, however, its common practice to put an AF above most keys, this means you can listen to that panel, even if that person is not talking to you - This can be overridden with privacy AKA sunglasses mode. It is necessary to have a listen function for PL's, so having an AF everywhere simplifies programming and saves time).
Do the same for all the ports 21 DIR, 22 TD, 23 A1, Once you have all the Alphas on the Panels, send the change to the frame.
If you need to change or update an Alpha - CTRL and F12 bring up the Edit Alpha / Description directly, without having to go back to the main Alphas page. This works on most pages PL's, IFB etc.
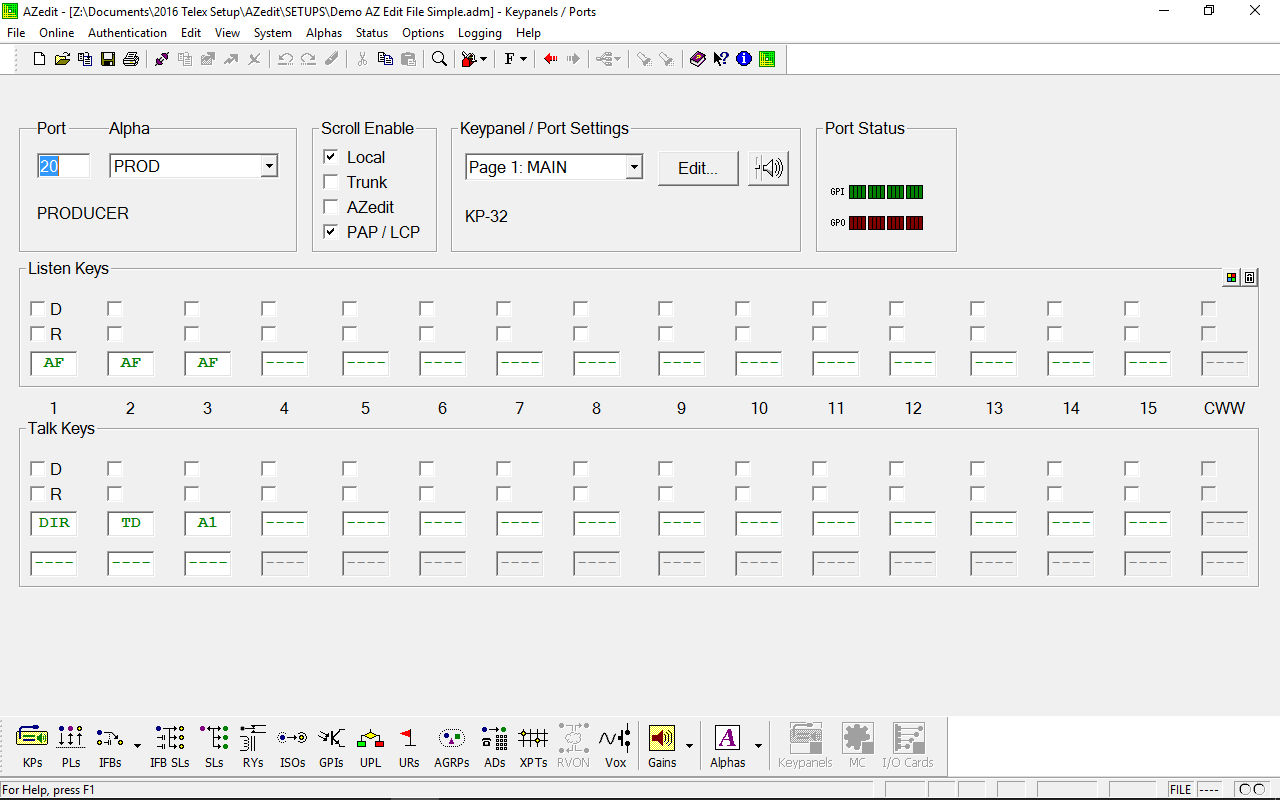
Alphas - besides Point to Point between Keypanels, it's normal to also need some PL's and IFB's, think of these as virtual keys, programmed to do specific tasks. (like the function keys on a keyboard) This is a two-step process, first, we need to name the Alphas which are accessed from either the drop-down arrow next to ALPHAS or directly from the NAV 2 toolbar.
It's easier to name as many of the Alphas as possible before starting to program panels and build PL's / IFB's.
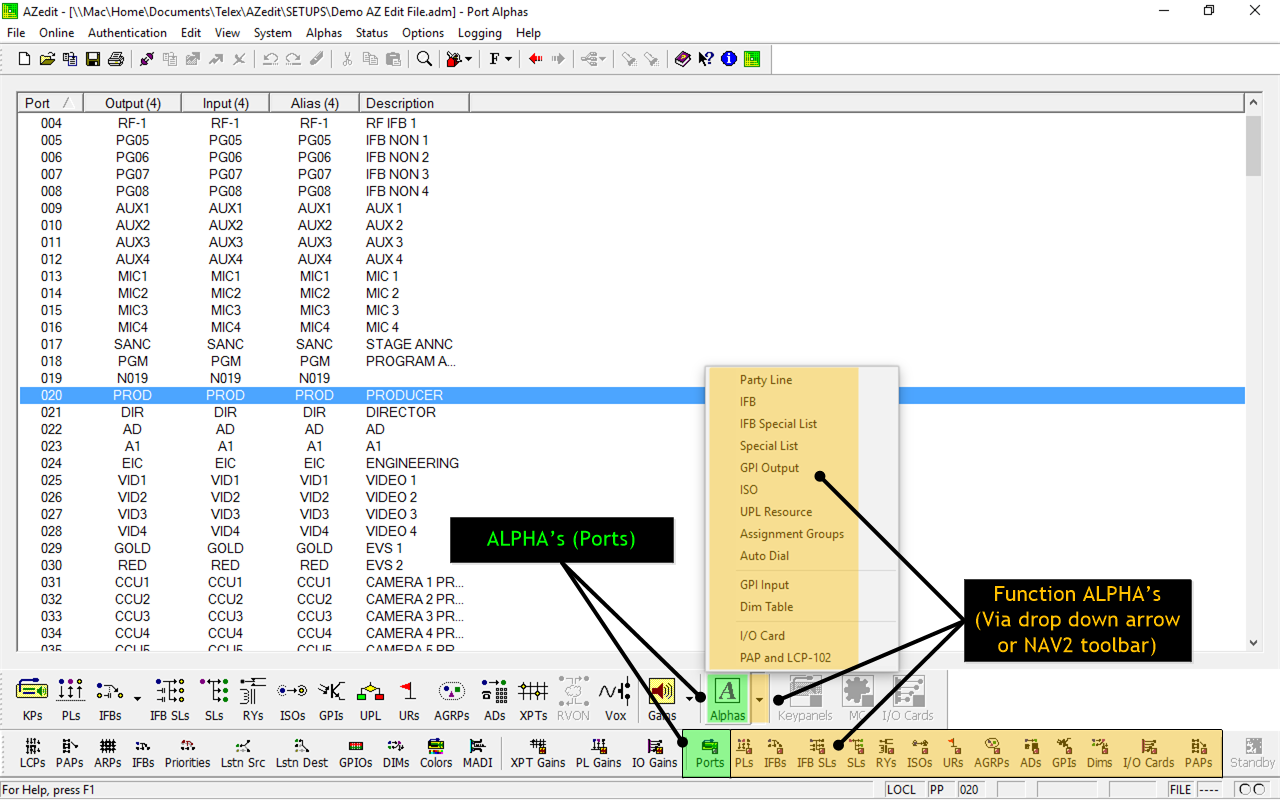
A Party Line enables a group of people to communicate under one key - similar to a conference call. The most common application is to group camera ports together for the Director.
PL's should always be used for non-key panel devices, such as 2-4 wire converters and CCU's. PL listen keys always have to be turned on manually to listen because these devices don't have RTS data like the KP's do.
A PL can also be used as a simple way for a group of KP users to communicate with each other, allowing everyone to hear everything. It's not necessary or recommended to add the KP ports to a PL, you can just add the PL alpha itself to the panels, This is how TAPE operators and producers work together.
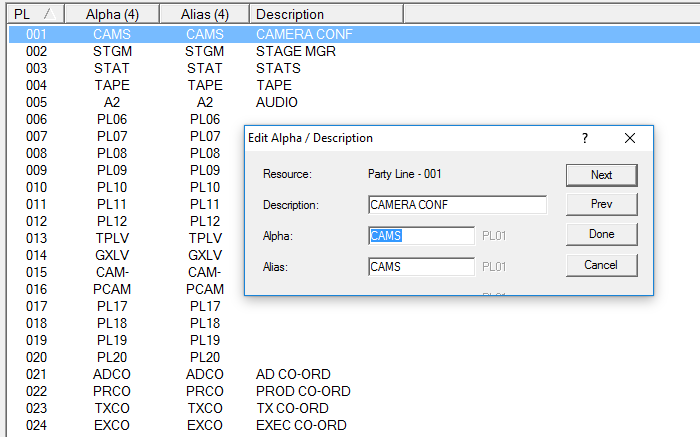
Ports are added or removed from a Party Line by going to the main PL's screen, accessible from the PL button on the NAV toolbar. The top left boxes allow selection of the PL for viewing/editing, either via number or name.
Here show CCU's ports (Cameras) being added to the CAMS PL. It's possible to manipulate one port or multiple ports by highlighting several lines using the shift or ctrl keys. (like in Excel) The blue lines show which PL's are ready to be edited and can be added to or removed from PL by the 4 buttons on the right on the right.
You can also sort the view by clicking at the top of each column, here it's sorted by the P-T column - see the small triangle. Clicking that button again reverses the sort in the opposite direction. You will have to roll the scroll bar up to the top to see.
IFB (interruptible Fold Back) describes how on-air talent hears a dedicated program feed of the production and is also how producers and directors provide cues and instructions - by Interrupting - the Fold Back.
Again, start by going to the Alphas IFB screen. It's important not to duplicate Alphas anywhere in AZedit- especially with IFBs, You have to name the IFB and the port it's using discreet Alphas. In this example, the port (N001) is called PG01 (Program 1) and the IFB is called PxP (play by play)
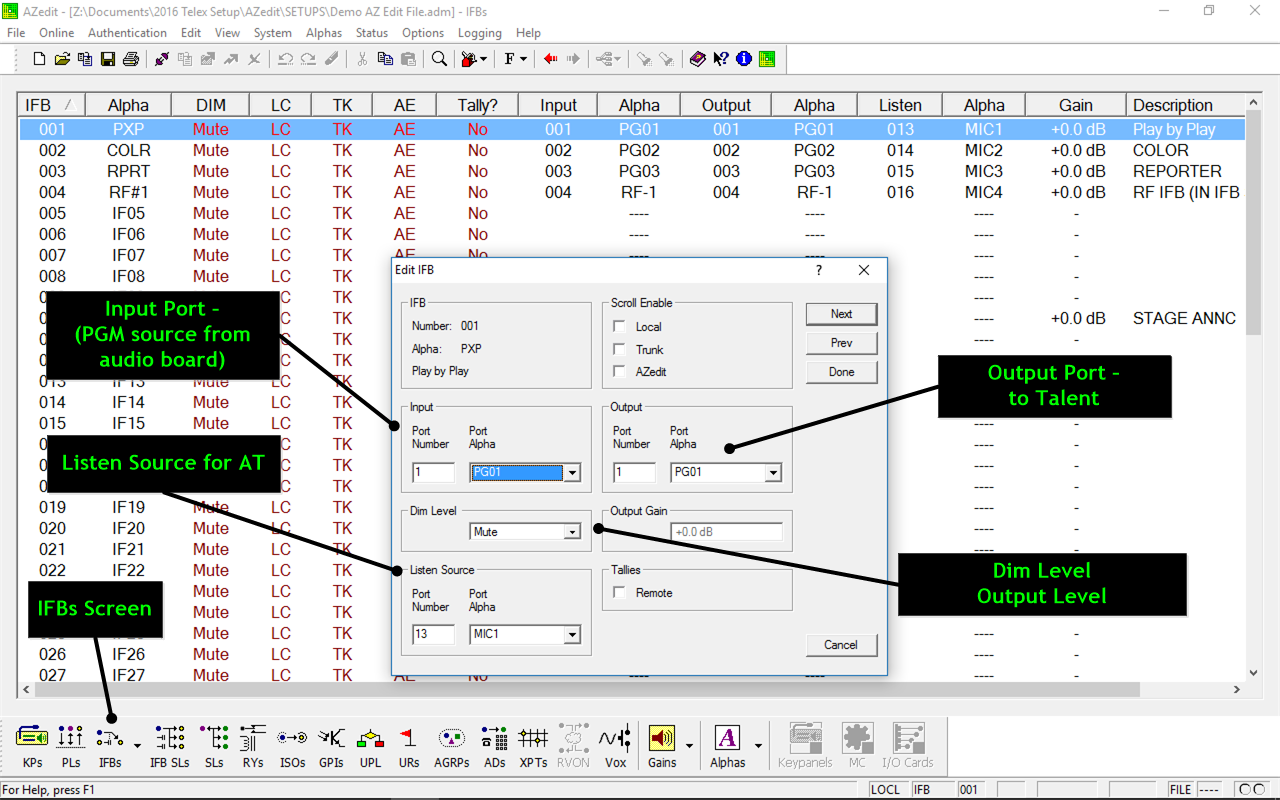
Below is the IFB screen. The primary function of an IFB is to route a program input to an output port, essentially forcing a crosspoint.
Here we are working on IFB 1 (highlighted in blue) The program source is Port 1 and we are using the same port to send it back out on - but it can be any combination of IP to OP. In the IFB table, IFB4 (RF-1) is being fed by PGM3 but the output is Port 16 - which could be a patch point in the truck.
(Also note that the IFB ALPHA is RF-1 but the PORT is RF#1 to avoid a duplicate Alpha).
There's also a control for the dip level, this is how much the program feed drops when it's Interrupted, some people prefer a full cut (mute, others may prefer a dip -10dB's).
It's also possible to set up an automatic listen source for KP's. In this example, we have port 13 or MIC1 selected, anywhere we add this IFB to a panel talk key, we can now use an AT on the listen side of the key, Now, when anyone keys up to listen they will hear MIC1 - making 2-way conversation possible.
There are 2 benefits here, it makes programming KP's quicker - not having to remember which port has which Talents mic, it's also very quick to change if a Mic goes bad or talent moves since you only have to change it in one place.
KP Programming - Once the ports, IFB's and PL's are built you can start to program all the Keys and Panels.
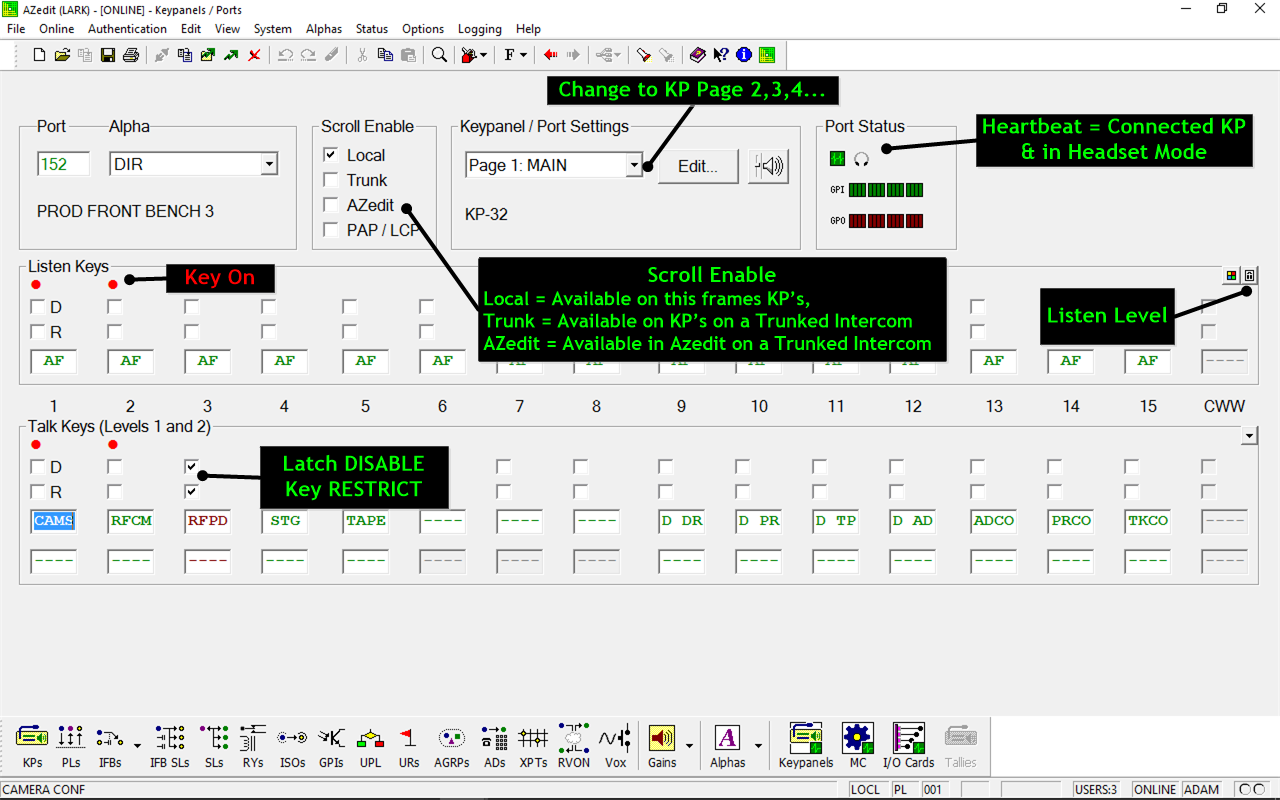
Tab or Shift-Tab moves the highlighted key left or right along a row to edit programming for the individual keys.
PAGE UP or PAGE DOWN changes between the lower and upper row of keys or you can use the drop-down under Keypanel / Port Settings.
Port status shows a green heartbeat icon if a KP is connected and a headset icon if it's in head-set, not speaker mode. (KP's also have GPIO capability, the 4 red / green boxes show their status).
The D checkmark box latch DISABLES that Key from permanently talking or listening. The R RESTRICTS a key panel user from editing that Key using their KP menu. Holding SHIFT and checking a D or R box turns all the checkmarks to the right ON or OFF if they're already on.
Scroll Enable determines where this port can be seen for other users to program it. Local adds it to the scroll list of KP's on the same Intercom, Trunk adds it to KP's on trunked Intercoms and AZ edit makes it available in AZ edit sessions on other frames.
CTRL-TAB changes the default view between "Setup Page" or Panel Type - which shows all the Talk Keys for both rows in one view. A drop-down arrow next to the Listen Level will toggle the view to Listen Keys.
Once one KP is programmed you can copy it to another port, go to any blank area on the page, and either right-click or CTRL-C, then go to the new port and CTRL-V or right-click to paste.
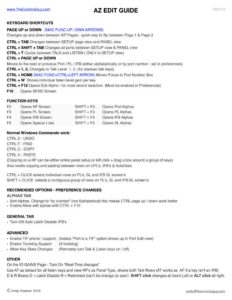
CTRL PAGE UP / DOWN changes the port either alphabetically or numerically depending on preferences - alphas - sort alphas. This also works in IFB's and PL's etc.
